If you’re planning to go on your first camping adventure, one of the most important things you should learn is how to set up a camping tent. It looks fairly simple, and it is — once you get the hang of it. So let’s make sure you get the hang of it with this beginner’s guide on setting up a tent.

It is always important to know how to set up a tent, regardless of whether you are an experienced camper or a first-time camper. There are many different types of tents on the market, and each one has its own unique set-up process. If you don’t know how to set up your tent, you could end up spending hours fumbling around with the poles, only to give up in frustration.
Knowing how to set up a tent is also important for safety reasons. If you are camping in an area that is prone to severe weather, it is vital that you know how to properly secure your tent so that it doesn’t blow away in high winds or collapse under the weight of heavy rain or snow.
Finally, knowing how to set up a tent will make your camping trips much more enjoyable. There is nothing worse than arriving at your campsite after a long day of hiking, only to realize that you have no idea how to put your tent together. By taking the time to learn how to set up a tent before your trip, you can relax and enjoy yourself once you finally reach your destination.
How do you set up a tent for the very first time?
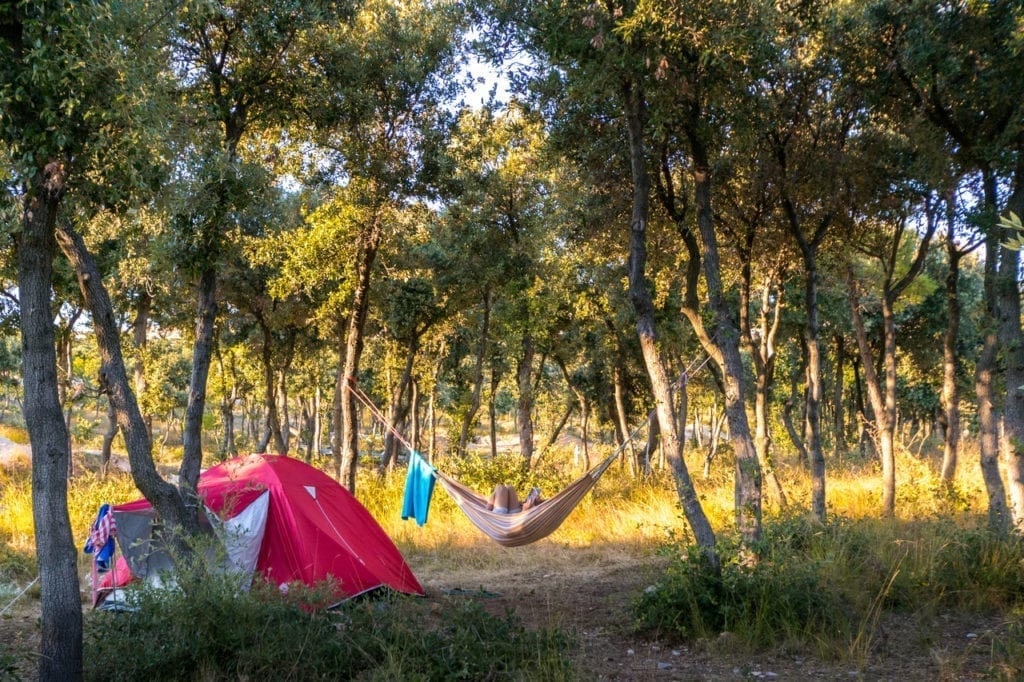
Step 1# Find an appropriate camping site
The most important thing to remember when you’re looking for a spot to set up your tent, is that it should always be flat and a little bit raised. A good rule of thumb is to avoid any place that’s lower than surrounding areas, that way you’ll be sure you won’t wake up in a pool of water in the morning.
When you find the right position for your camping site, make sure you clear the area of any roots, large sticks, rocks, branches, twigs, pine cones… Generally speaking, clear everything that could damage your tent and that you wouldn’t want to sleep on.
At Camping Village Šimuni, we prepared all cleared of the camping pitches in advance, so you can set up your tent and start with your camping vacation in no time. They’re also in ideal positions – hidden in the shade so you’re sheltered from the sun, but close to the sea so you can go for a quick dip whenever you like!
Step 2# Lay a tarp on your camping site
Before you start setting up your tent, you should always put some sort of barrier between the ground and your tent in order to protect it from damage and to stop water and other types of moisture from coming into the tent. That’s what the tarp is for! Your tent should come with one, but if it doesn’t, grab a plastic or vinyl ground cloth. Just make sure it’s roughly the same size as the footprint of your tent. When you find an appropriate tarp for your tent, lay it flat on the camping site you previously cleared.
Step 3# Unpack the tent and lay it on the tarp
First off, unfold your tent and locate the poles, stakes and the fly. Put them aside as you’ll need all of that a little bit later. When you’ve done that, take your tent, find its bottom side and spread it across the tarp.
If you have a bigger tent, during this step, you might want to position your tent’s doors and windows in the direction you want them to face, as that might get a little bit difficult later. On the other hand, if you have a small tent, you don’t have to worry about it now, as setting the direction of the tent will be easier once you attach the poles.
Step 4# Connect the poles and attach them to the tent
Depending on your tent, poles can come in a variety of types, but they always come in sections you’ll need to connect. Some may be connected with a cord which makes the setup extremely simple, while others may be colored or numbered, so you’ll have to do a little digging to find which tent pole connects where.
Whatever the case, take your poles, find the matching ones and connect them to each other. After you’ve done that, it’s time to attach them to the tent. Basic tents usually have only two large poles that cross each other in the middle of the tent, while the advanced ones have more. But they usually connect to the tent in one of two ways – either by clipping the poles directly to the tent or sliding the poles into the flaps.
If you have a tent with clips, lay your poles on the tent and secure each part with a clip so it doesn’t detach, and if you have a tent with flaps, find the eyelets on the corners and slide the poles into the flaps till they reach the other side.
The easy part is done, now it gets a bit tricky. You might wanna get some help for this next part!
Step 5# Raise the tent and stake it to the ground
Now that you’ve attached the poles to the tent, it’s time to fully raise it. If you have a self-standing tent, poles will bend on their own and straighten the tent by itself, so the only thing you’ll need to do is to secure it to the ground.
If, on the other hand, you have a regular tent, you’ll have to do some legwork. Start with one of the poles, bend it and stretch the entire tent, so that you could connect the end of that pole to its corresponding corner. After you’re done, move on to the next pole. It gets harder as you go because you’re stretching the tent quite a bit, so don’t be shy and ask for help. After you’ve connected the last pole to the corner, put the tent down and adjust its direction.
Now that your tent is up, you need to secure it by staking it to the ground. On the corners of the tent, you’ll find straps with loops or grommets, so grab a stake and push it through the loop and into the ground. Use a hammer if you need, but make sure it’s as tight as possible, so that your tent stays in place. Also, try to push the stake into the ground at an angle, so that your strap and stake don’t fly off if it gets windy.
Step 6# Finish by putting on the fly
Now that you’ve set up your tent, there’s only one thing to do – prevent it from getting wet. You see, most camping tents aren’t waterproof, so you’ll need some sort of waterproof material that you can put on your tent in case it starts raining. That’s where fly comes into play!
Setting up a fly over your camping tent is very simple. Start by taking the fly and placing it over your tent – make sure you line it up with the entrance to your tent. After you put the fly over your tent, attach it to the poles of your tent so it stays in place. If you have a paracord, tie it to the top of your fly and slightly raise it, so it doesn’t lie directly on your tent. This final step is optional, but it will fully prevent your tent from getting wet in case of rain.
Your tent is complete, so it’s time to put the bedding and your gear inside!
Step 7# Your camping tent is all set up
And that’s it, now you know how to set up a camping tent. Depending on the model of the tent you get, the above-mentioned steps may be a little bit different, but nothing major. Also, if you get a new tent, make sure to practice setting it up at home before you go camping, just to check if everything’s OK with the tent and to get a grip on all the parts.
Most common mistakes to avoid when setting up your tent
Not using a ground tarp
One of the most common mistakes people make when setting up their tent is not using a ground tarp. A ground tarp helps to protect the bottom of your tent from moisture and dirt. It also makes it easier to set up your tent on uneven ground.
Not using guy lines
Another common mistake is not guy lines. Guy lines help to stabilize your tent and keep it from blowing away in strong winds. Make sure to use guy lines that are appropriate for the size and weight of your tent.
Not staking the tent down
Another mistake is not properly staking down your tent. Stakes help to secure your tent to the ground and prevent it from being blown away or collapsing in high winds. Make sure to use stakes that are appropriate for the size and weight of your tent, and be sure to stake down all corners and guys lines.
How to make tent camping comfortable?
Bring a comfortable sleeping pad
Invest in a good sleeping pad. A comfortable sleeping surface is key to a good night’s sleep when camping. Air mattresses or self-inflating pads are worth the investment if you plan on doing any serious camping.
Bring a sleeping bag or bedding to keep warm
Bring along some cozy bedding. Even if you’re just using a sleeping bag, adding an extra blanket or two can make a world of difference in how comfortable you are at night. If you get cold easily, consider bringing along a heated blanket or electric mattress pad.
Bring some lounging furniture
Pack some camp chairs and/or an air mattress for lounging during the day. There’s nothing worse than being stuck sitting on the ground all day long when you’re trying to relax on your vacation. Camp chairs and air mattresses can give you a much more comfortable place to hang out during the day (and they’re great for naps!).
How to take care of your tent?
Assuming you have a typical three-season tent, there are some basic things you can do to keep it in good condition and make it last longer. First, always pitch your tent on a dry, level surface to prevent water from pooling inside or damaging the bottom of the tent. If it’s wet or damp outside, put a tarp down first.
Second, avoid touching the walls of the tent with anything sharp – this includes branches and rocks. Sharp objects can create holes that let in water or insects.
Third, when you take your tent down, be sure to clean it before storing it away. Remove any dirt or debris from the fabric with a soft brush or cloth; if there are any stubborn stains, you can spot clean with mild soap and warm water. Let the tent air out completely before folding it up for storage; this will help prevent musty smells and mildew growth.
Camping in a tent is awesome and you’ll quickly fall in love with the idea of sleeping under the stars. But if you’re just starting with camping and you’re full of questions, feel free to contact us anytime.
Otherwise, you’re all set, the only thing you just need to do is plan your next camping vacation!